Friday, March 28, 2014

Sing it with me.....Somewhere over the rainbow.....

My 12 year old daughter Madison is in a local production of The Wizard of Oz; which is one of my all time favorites!  It is a pretty awesome deal and I can't wait to see it tonight.  The production will be completely put on by young people (on and off stage).  They had help of course up until now....but once the curtains open....the adults step back and let the kids take the reigns.  What an amazing opportunity.

I unfortunately was unable to help much over the past couple of months with rehearsals.  But....I was able to throw these goodies together for the bake sale during intermission.  We have some melted witches, some rainbow cupcakes, yellow "bricks", and some brownies.  (All are gluten free except for the cupcakes).  I miss being able to make fun treats since we have been on the gluten free diet.  It takes the fun out of it....but I am coming around and making it work.  I was super nervous and anxious while making the cupcakes in our house.  I could have made them gluten free...but the performances are Thursday, Friday, and Saturday and I made them a couple days in advance.  Gluten free cupcakes just don't seem to last more than a few hours.  :(  

I created the tags for the melting witches in design studio.  I figured not everyone would know what they were or if they were even edible. LOL  I cannot find the file for this right now (I hope I saved it).  If I find it I will share it here :)


Madison and I wanted to create a sign as well.  We picked up the wooden sign at M's and she painted it.  Then I used some print and cut vinyl I wanted to test out to create the rainbow and I cut out the words with it as well....just because I wanted the letters to match the rainbow colors.  YIKES!  I am turning into such a picky crafter lately.  LOL


I created the rainbow in Designer studio and if you are interested I have shared the files for this sign here:
There are a number of files for this design. 


 I first printed and cut my rainbows to test out the printable vinyl.  I was then a bit worried I had wasted a whole page of printable vinyl because of the printed registration marks. 
(TIP ALERT) I quickly realized that the registration marks always print in the same spot.  

So.....to continue to use the vinyl to it's fullest potential.....
1.arrange additional print and cut images around images you already printed
2. delete previously printed images
3. DO NOT print the registration marks again (to prevent any possible errors of it not printing exactly where your paper fed into the printer the last time)


For convenience....I created a separate file for printing and cutting.  For the PRINT file I offset all of the letters to help fill in the edges of the letters so I would not have any white edges on the vinyl once it is cut.  Then when you are ready to cut your vinyl use the CUT file.

TIP ALERT: Remember to change your printer settings to high quality photo print when printing on printable vinyl.  I didn't do this the first time and had lines going through my rainbow. :( 


Thanks for stopping by.  Happy Merrymaking!

Tuesday, March 25, 2014

Have you filled a bucket today?


Oh HAPPY day!  My Love bucket has been filled by a fellow blogger:
http://mypapercraze.wordpress.com/

Thank you so much Glenna and Becky for nominated me and my 'lil ole blog for the Liebster award.  What is a Liebster award you say?  I wondered the same thing.  Liebster is German word  meaning: sweetest, kindest, nicest, dearest, beloved, lovely, kind, pleasant, valued, cute, endearing, and welcome.

The Liebster Award is for small up-and-coming blogs given by other small bloggers.

Make sure to check out Glenna and Becky over at their inspiring blog: My Paper Craze


So you want to know a little about me? Let's get this little Q & A out of the way ;)

1. Why did you decide to start a blog?

I was a blogger a year or so ago but life got in the way and I had very little time to craft.  Then.....my Silhouette Cameo came into my life and I decided that I needed to craft to be happy...content...fulfilled. Crafting is my release and I can feel the difference in my stress level now that I am back to crafting on a regular basis.  :)

2. Is blogging your obsession or your hobby?

Well....I think I would have to say both.  LOL  I may be a little obsessed with the thrill I get from sharing my creations and I have to say that I enjoy how all of my lovely visitors fill my love bucket with each of their comments on my posts.  

And.....I think it goes along with the hobby of crafting to share and who better to give you some productive criticism than your crafty friends?

3. What is your greatest source of inspiration for your blog?

Pinterest and other bloggers are where I find inspiration for new projects.  

4. Do you plan your posts in advance or are you a spur-of-the-moment blogger?

Most of my posts are somewhat planned (in my mind) before I post them.  Then when I have the time I bring the important elements into a draft and fill in the details as the words come to me.  Sometimes it comes together quickly....but other times it takes awhile for the words to come together.  (I am getting picky in my old age...LOL)

5. If you could choose a blog-idol, who would it be?

These questions are hard! LOL  Hmmm.............. There are so many great blogs out there!  I guess right now it would be Clever Someday.  She has amazing tutorials.  I want to be able to offer such amazing and detailed tutorials one day!

6. What do you consider your biggest success so far as a blogger?

I consider it a success anytime I can post something that inspires someone else.  That is why we blog and that is why we visit blogs after all isn't it?  To be inspired?

7. What has been your biggest obstacle?

Time is my biggest obstacle.  But as I said before.  I have become aware of how much creating is a part of me and I feel like I am a better person all around when I take the time to express myself and release some stress by designing and creating.  I am working on making that time and I think that my family reaps the benefits as well of me crafting.

8. Is there anything you would change about your journey into blogging?

I would go back to a year or so ago and make sure that I didn't ever stop crafting (no matter what was going on in my life).  It is just so therapeutic!

9. Do you have any insight to share with those contemplating starting a blog?

Just do it!  Jump right in with both feet!  The more you do it...the easier it will come!  And soon your love bucket will be filling up with comments for your friendly visitors!  The crafting community is so warm and welcoming!  It is a big family in your computer!!!

10. What is your favorite activity (or non-activity) to relax?

BATHS!  I am currently offering child care in my home while my 4 (not-so-little) kiddos are gone to school. Then they come home and the day care kids leave and there is little to no quiet time in my day.  I try to sneak away to a bath every night just to have a little quiet time to relax....but even then....I usually have someone knocking on the door. ( I am sure I will miss these years when they are gone....at least that is what I am told.  Haha)

11. What do you envision for your blog in 10 years?

Ooh....I would love to somehow be making a living from my crafts in 10 years (I don't know how this is going to happen yet....but it would be a dream if it I could make it work.)  10 years is a long ways away and so much can happen between now and then....and oh the toys that will be available to us crafters to play with.


-----------------------------------------------------------------------------------
11 Random facts about me - hmmm....what do you want to know?

1. I am a mother to 4 amazing kiddos ages 7,10,12, and 14.  (They are getting so big :( )  I was a stay at home mama for about 10 years but when my youngest went to school....I too had to go back to work.  I so miss those SAHM years!

2. We are a gluten free family.  3 of my kids have Celiac Disease (half of our family) so we are pretty much completely gluten free in our home.  

3. We own a carnival.  I married into a family owned carnival business.  My kids are 5th generation.  Please don't get scared off...we don't live up to the "Carney" name that most people think of when they hear that.  We are a very clean and family run show and we pride ourselves in that.  It is a crazy life....but like anything else...it has its pros and cons.  We stay in our state of Wisconsin and our carnival only travels throughout the summer months and then we stay in our homes and get "real" jobs in the winter.  LOL

4. I am a lefty.  That puts me in my right mind right?  ;)

5. I dream of a trip to Bora Bora someday.  Have you seen pics of this place? It is so beautiful! Hubby and I never treated ourselves to a honeymoon....so when our kids grow up.....we are SO going on a trip somewhere.  Bora Bora might be out of my reach....but a girl can dream right?

6. I love to sing.  Though not so much in front of strangers.  I was in choir in middle school and high school and now my 12 year old is a little singer herself and I am living a little bit vicariously through her as she spread her wings.

7. I do not drink.  (OK... maybe a wine cooler once a year....if I can finish it.)  I just never found a thrill in it.  Neither hubby or myself drink.  He has never had a drink in his life.  Pretty crazy with us living in Wisconsin. I remember growing up...my dads family basically lived in the taverns.  Just the way of life up in the nort woods. Statistically.....this is good news for our children.  They are less likely to be drinkers as well.

8. My favorite season is the fall.  The colors are beautiful!  The smells are amazing!  The weather is comfortable.  What's not to love?

9. My favorite color is green.

10. I am recently more interested in my appearance.  Maybe it is me gong through a midlife crisis or something.  (Not that I would have been found on one of those crazy walmart clips or anything) But I was always a jeans and t-shirt kinda gal...and still am for the most part....but all these outfit posts on pinterest make me want to go out and find cute outfits.  Slowly I am glamming up a bit...a tiny bit.  ;)

11. I am a list maker.  I make daily to do lists and long term to do lists and I just love the feeling of crossing tasks off as done.  It feels so good to feel like I have accomplished something when usually I have cleaned my house only to turn around to see everything I have done...undone.


Now it is my turn to fill a few buckets!  Make sure to stop by and visit these lovely bloggers.....help me fill their buckets with some blog comment love!  I must admit I did not have these ladies and their blogs readily available to share.  Most of the blogs I follow have a large following already.  It was fun to look around and find some newer bloggers with amazing skills that I can now follow and be inspired by.


My fabulous liebster award nominees are:


Eleven Questions for my Eleven Blogs

Now let’s get to know a little more about these amazing bloggers!
  1. Why did you decide to start a blog?
  2. Is blogging your obsession or your hobby?
  3. What is your greatest source of inspiration for your blog?
  4. Do you plan your posts in advance or are you a spur-of-the-moment blogger?
  5. If you could choose a blog-idol, who would it be?
  6. What do you consider your biggest success so far as a blogger?
  7. What has been your biggest obstacle?
  8. Is there anything you would change about your journey into blogging?
  9. Do you have any insight to share with those contemplating starting a blog?
  10. What is your favorite activity (or non-activity) to relax?
  11. What do you envision for your blog in 10 years?


Sunday, March 23, 2014

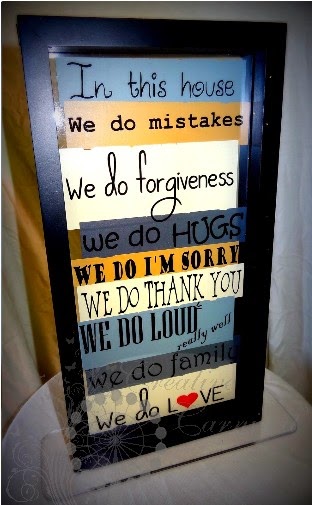
In This House sign

Happy Merrymaking friends!  Today I am happy to share a sign I recently created for a local benefit.  I am in love with the many signs I am seeing on Pinterest made with pallet slats.  But...until I have the time space AND materials for that....I improvised.  
(Actually...it was hubbies idea to create the "pallets" layer)  

Here is a brief tutorial:
Materials:
Floating Frame (I used a 6x12 frame that I picked up at Micheal's BOGO free sale)
Vinyl (I used light gray, dark gray, beige, tan, black, and red)
Lexan or Plexiglass (We got ours for free at our local hardware store - just asked if they had any scraps and they were happy to give us a strip from their bin)

1) Design of course....that takes the most time; but it is the most fun too!  I love designing :) Then finding and choosing fonts (Ahh...so many to choose from!!!)  and then I designed the "pallets"
LUCKY YOU!  IF YOU LIKE WHAT YOU SEE...YOU DON'T HAVE TO DESIGN IT...I AM SHARING THE FILE (see below) (FOR PERSONAL USE ONLY!)

2) I matched the placement of the "pallets" with my phrases in the Silhouette Studio. 
(THIS STEP IS DONE FOR YOU AS WELL IF YOU DOWNLOAD THE FILES ;) )  

3) Cut your vinyl.  Remember to cut words in reverse (AGAIN....FILE IS ALREADY IN REVERSE IMAGE AND READY TO CUT ;) )  There are 5 files for this project.  I created a separate file for each pallet color to keep them organized. 

4) Adhere vinyl to glass.  Using transfer tape; transfer the words to the back side of the front piece of glass.  Then lay that glass underneath the 2nd piece of glass to use as a guide to place your "pallets".  One "pallet" at a time; place them so they cover each phrase.

5) Lay phrases glass on top of "pallets" glass and insert into frame.

6) Have your amazing husband cut a piece of Lexan in the appropriate size.  This is just to stabilize the frame so that it can stand on a table without tipping easily.  It worked perfectly!

What do you think?  I love how it turned out!  If you love it too; you are welcome to download my files for personal use.  If you would love to see more free .studio files; please consider a small donation to support future creative efforts!
(See donate button in side bar - I thank you for your support!)
PLEASE CONTACT ME FOR COMMERCIAL USE


In This House:
https://app.box.com/s/3wtpdcoa9aaazubqm9uf

Saturday, March 15, 2014

Bloglovin

After seeing a few fellow crafters suggest Bloglovin.....I guess I will give it a try too.  :)

Follow my blog with Bloglovin

Monday, March 10, 2014

Decoupaged Letters (A scanner + A Silhouette = Spectacular results!)


I am super excited to be sharing this project!  My sister in law is a pinner but she is not a crafter.  Her idea of crafting is going to Etsy and whipping out the credit card.  LOL.  So our current relationship is...she pins….I say “I can make that” and we go shopping and have a craft day.  I will make a crafter out of her yet.  ;)  

Our most recent project was this adorable wall art for baby Jackson.  She is due May 5th. (Baby Jackson is having a few complications though and momma's status has recently been considered high risk.  Lots of prayers for Jackson to stay in mommas tummy as long as possible.) 

I was super excited to put my new toy to work on this project.  I wasn't sure if it would work...but I thought if I just scanned in the image of each letter and traced it in Silhouette Design Studio...I would be able to cut out a perfect match. (Instead of the old tracing/exact-o knife method)

Guess what?!  IT WORKED!!!!!  
  
Supplies needed:

Wooden letters (We got ours at Michael's.  They come painted white and they are ready to hang with a screw hole in the back)
Paper of choice (We found this super cute paper at Hobby Lobby and it matches Jackson’s room perfectly)
Wooden shapes (We found these at Hobby Lobby as well…another perfect match!)
Silhouette
Scanner
Yes! Paste (or modge podge)

Let’s get started!

Using a scanner, scan and save an image (I saved as a JPEG) of each wooden letter in your project.  (Remember where you save your scanned images).  I have a HP Officejet 6500A plus all in one scanner/printer/copy/fax.   (I did have an issue while trying to use my sister in laws scanner (Canon – not sure of the model number) and the scanned image was not coming out in the correct proportion.  I would suggest testing this with one letter first to make sure that your scanner will cooperate with you. 


In Silhouette design studio select:
FILE tab…
Select MERGE….
CHANGE FILE TYPE to JPEG
SELECT YOUR SCANNED IMAGE (do you remember where you saved it?)
Your image will open in Silhouette Studio. 


Next we need to trace the letter:
  • Open the TRACING TOOL
  • Click “SELECT TRACE AREA” button
  • SELECT TRACE AREA by clicking to the right of your letter and while holding down the left mouse button; box in your letter leaving a small border around your letter.  (You may need to adjust high/low pass filters to get a completely closed path.)…
  • Click on the “TRACE” option in the box on the right of your screen.
  • CLICK ON YOUR IMAGE AND MOVE IT OFF YOUR MAT. (You can delete the image if you like….I waited until I was happy with my trace in case I needed to retrace the letter)…


Use the ERASER TOOL to remove any “specs” that may have traced inside of your letter. (You don’t want random dots cut in your letter.)

Now you need to REMOVE OUTER LATER of your trace. 

    ZOOM IN to the edge of your letter….
                DOUBLE CLICK to show points…
                SELECT/DELETE POINTS FROM OUTER LINE

                   There are a couple of ways to do this:
                         -Select points individually/right click/delete point
                          Once You get Started...you can move quite quickly by repeating:
                          right click/delete point
                        *Remember the undo button if you happen to delete the wrong point.
                         -To delete multiple points at the same time: 
                          hold down shift key/box in points/right click/delete point

You should now have a single lined trace of your letter.
- If you have any rough edges anywhere simply do a quick trace and it should trace a nice smooth line.
- I would print a test of this on plain paper with your printer to ensure a perfect match. Just print and lay your wooden letter on top. If all is well you are ready to cut out your letters!

Lay out your letters and paper and decide what paper you would like for each letter. 
I suggest alternating patterned paper with a solid color. 
When you have a pattern you like, cut out each letter. 

(TIP – DOUBLE CHECK THAT YOUR PATTERNED PAPER IS NOT UPSIDE DOWN WHEN YOU CUT. YES….I KNOW THIS FROM EXPERIENCE….OOPS…:-\ )

Now lets put this all together.    
         - Apply a layer of Yes! Paste or Modge Podge to the wooden letter.
         - Place paper letter on top and smooth out.
         - Apply another layer of Yes! Paste or Modge Podge.        
         - Use hot glue/Wood glue/E6000 to attach the wooden shapes.
         - Hang and enjoy!


Would you like to check out more 
Silhouette projects?  

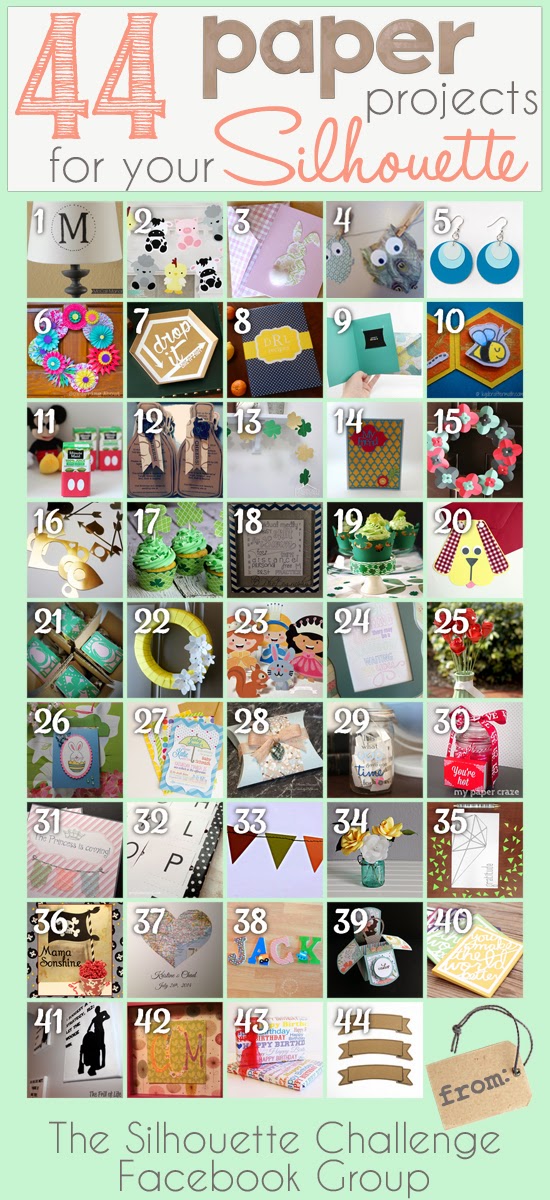
I am super excited to be joining the monthly Silhouette Challenge group for the first time! This months theme is PAPER and all of the Silhouette Challenge gals are posting their projects today.  Get inspired by checking out the projects below...and don't forget to leave some love...you just might make someones day!

The Great Lamp Rescue Barnyard Animal Paper Garland & Party Details Sweet and Simple Easter Bunny Card Owl Theme Baby Shower Ombre Paint Chip Earrings & Free Cut File Spring is Blooming Drop It (Like It's Hot) Hexagon Tray Spruce Up Your RECIPE BOOK Gift Card Giving Free Cut Files Custom outlines for stamps Mickey Mouse Clubhouse Juice Boxes Wine Themed Bridal Shower Learn How To Make A Sewn Paper Garland! Moroccan Thank You Card 3D Flower Spring Wreath For the Love of Paper: Cutting Embellishments Create Your Own St. Patrick's Day Cupcake Wrappers and Toppers Swimming Word Art St. Patrick's Day Lime White Chocolate Chips Cupcakes + Freebie You're invited to a dog party! I'm so Lucky! Spring Wreath with SIlhouette Cut Flowers Tiny Princesses Paper Dolls Colorful Quote with your Silhouette Get Well Bouquet with Persimmon Roses Greeting Card Holder Baby Shower Invitations How-To Create a Custom Pillowbox on Your Silhouette Machine + Free Cut File! Quality Time Jar Matchbox Cover with {FREE CUT FILE} DIY Baby Girl Shower Invitation Candy Alphabet Travel Game Paper Garland Pretty Paper Roses DIY Geometric Heart Journal Hand Made Decorations for a Pirate Party Wedding Shower Gift Heart Map Decoupaged Letters (A scanner + A Silhouette = Spectacular results!) Easter Pop-up Box Card with Sweet Sorbet Designer Paper from Stampin' Up! Better World Greeting Cards Star Wars Silhouette Canvas Monogrammed Gifts Make Printable Gift Wrap with your Silhouette Software Free Printable: Blank Banner with free Silhouette Cut File
1. McCall Manor // 2. The Turquoise Home // 3. Creative Savings // 4. Sandpaper and Glue // 5. The Thinking Closet // 6. Sowdering About in Seattle // 7. Persia Lou // 8. From Wine to Whine // 9. Dream a Little Bigger // 10. Please Excuse My Craftermath... // 11. Play. Party. Pin. // 12. Everyday Paper // 13. Practically Functional // 14. A Tossed Salad Life // 15. My Favorite Finds // 16. The House on Hillbrook // 17. Adventures in All Things Food // 18. A Glimpse Into Barb's Life // 19. TitiCrafty // 20. The Experimental Home // 21. feto soap blog // 22. Creative Ramblings // 23. The Stamp Doc // 24. Ginger Snap Crafts // 25. Simply Kelly Designs // 26. Whats Next Ma // 27. unOriginal Mom // 28. Bringing Creativity 2 Life // 29. Cutesy Crafts // 30. My Paper Craze // 31. Create & Babble // 32. Grey Luster Girl // 33. The Sensory Emporium // 34. Lil' Mrs. Tori // 35. Black and White Obsession // 36. Mama Sonshine // 37. Weekend Craft // 38. Creative Carnival // 39. Peace, Love and Joyce // 40. Tried & True // 41. The Frill of Life // 42. Dragonfly & Lily Pads // 43. Get Silvered // 44. Minted Strawberry